With its 4WD, the Z-60/37FE has gradability to 45 percent and can travel up to 25 percent faster than comparable models.
Terex AWP has sent three teams to travel throughout Texas to assess Genie equipment in customers’ rental fleets following flooding from Hurricane Harvey and help them get back up and running.
The company has also issued water damage repair checklists for Genie booms, scissors and telehandlers to all customers in the area, as well as for the Deutz engines that power the machines.
The product support teams are working with the company’s sales team in Texas to make sure Genie customers are assisted as quickly as possible. Bartley also indicated that similar strategies will be used in Florida, once flooding from Hurricane Irma has diminished and it’s safe for the teams to be in the area.
 The diesel engine can power the machine entirely by itself, but also couples to a generator that powers the batteries, hydraulics and AC drive motors.
What to do with flood-damaged machines and engines
Genie released the following guidelines for dealing with flood-damaged machinery and engines:
In the event your Genie or Terex machine experiences water damage due to submersion or other water exposure, the following guidelines may be useful in attempting to repair your unit. You are responsible for any repairs made and for the maintenance and safe operation of your machine.
It is impossible for anyone to know the full extent of damage to a machine that has been fully or partially submerged in water without a complete disassembly, thorough visual inspection, repair, and function test of the affected components and/or systems. Depending largely on the depth and duration of submersion, some obvious areas of concern are:

List of Minimum Repairs Needed:
Notes: Mark the highest point of submersion for future reference during repair procedures. If such an indication is not evident, assume the machine was fully submerged. Thoroughly clean and visually inspect the machine to remove all mud, corrosion and debris. Significant effort should be made to thoroughly clean all surfaces exposed to flood waters to prevent latent degradation of paint and hardware due to corrosion.
Important: If exposed to saltwater, it may be impossible to overcome the long‐term corrosive effects on painted surfaces and hardware. Consideration should be given to refurbishment including complete disassembly, component/system replacement, media blast, new paint and new hardware.


1. Replace any and all Electrical Circuit components for which any part has been submerged in water including, but not limited to:
a. Control systems and boxes
b. Motors, brakes and any drive controllers
c. Machine controls
d. Switches, sensors, and power cables
e. Ignition Start Module, fuses and fuse panel
f. Batteries
g. Cables, chain, pulleys and sheaves
2. Disassemble, clean, and inspect all pinned joints, all boom sections and all bearing surfaces that have been submerged.
Replace any and all wear pads, hardware, chains/cables, and any damaged components. Clean, lubricate and reassemble.
3. Drain and remove the covers from drive/torque hubs and inspect for water intrusion.
If water is present, disassemble the gearbox, clean and inspect for damage. Replace any damaged components. Refill per service manual.
4. For aerials replace turntable bearing if submerged
5. Disassemble and inspect the Turntable Rotation Drive if submerged.
Clean and inspect for damage. Replace any damaged components and refill per service manual.
6. Remove all hydraulic cylinders, rotators, brakes, motors, pumps, manifolds and valves if submerged.
Have these components repaired by a qualified hydraulic repair facility. Replace all load holding valves on all cylinders.
7. Replace the hydraulic power unit(s) if submerged.
8. Drain the entire hydraulic system if submerged.
Clean and inspect the reservoir, refill and change filters per service manual.
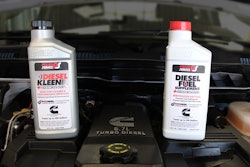
9. Drain the entire fuel system if submerged.
Clean and inspect the tank, refill and change filters per service manual.
10. Contact the engine manufacturer for repair recommendations, if submerged.
11. When all repairs are complete, an Annual Inspection must be performed before returning the machine to service.
12. Sample the hydraulic oil and fuel after 1 hour of functional operation.
Have these samples analyzed by a lab and follow their recommendations regarding oil changes, filtration intervals, or supplemental additives until a clean, water free, system is established.
Deutz engines
Submerged engines are considered no longer emissions compliant.
Engine replacement is the compliant course of action.
The following instructions are to be used as a guideline to make an engine temporarily operational.
Allowing the condition of the machine it is mounted in to be evaluated.
Note: If your engine has been submerged or partially submerged under water, do not simply try to start the engine until it is cleaned or reconditioned. Serious damage could occur to precision parts from dirt and silt ingress. In addition, this procedure should be followed immediately upon engine recovery from a flood condition.
Please be advised: the flood recovery instructions provided are a guide to assist customers during engine recovery, however, engine recovery success is always dependent upon flood severity.
Engines that are flooded can be further damaged and fail if the proper procedures are not followed prior to starting. With the exception of military or special purposes engines, diesel engines in general are not designed to be sealed against water entering the crankcase, and certain other components of the engine, when flooded.
If you are unsure of how to carry out any of the procedures listed, your DEUTZ Distributor can be contracted to perform these procedures for you. You may also consult with your distributor for technical advice, or consult with our DEUTZ Service Desk for advice.
The following procedures are intended specifically for DEUTZ Diesel engines and may not specifically address the procedures necessary for other engine brands. You should consult the manufacturer of those engines before starting.
I. Disconnect the battery.
Clean the exterior thoroughly with a hose or low-pressure steam cleaner
II. Intake and Exhaust Systems:
Inspect all areas of intake and exhaust system for debris and standing water.
1) Remove the air cleaner element from the air cleaner housing and replace it. In cases of oil-bath filtration systems: clean the oil bowl and change the oil.
2) If the intake air system contains any piping that is below the level of the air cleaner or the intake manifold, that would allow water to be trapped, this piping must be opened and the water completely drained. This would include the charge air cooler if the engine were so equipped.
3) Loosen the intake and exhaust manifold bolts or nuts to allow any accumulated water to drain or be removed manually.
4) Inspect the exhaust system piping and muffler to determine if any area would trap water and either loosen or remove these sections to allow water to drain. Exhaust after treatment mufflers and catalysts are deemed compromised and should be replaced.
III. Fuel System: The entire fuel system must be completely flushed.
1) Completely drain and flush the fuel tank with Diesel Fuel (properly dispose of the contaminated fuel). Refill the tank with clean (water free) fuel.
2) Remove the fuel suction line coming from the fuel tank to the fuel transfer pump and blow it out using compressed air.
3) Remove the fuel line going from the fuel transfer pump to the fuel filter and blow it out with compressed air.
4) Remove the fuel return piping and blow it out with compressed air.
5) Change the primary fuel filter and if equipped the fuel pre-filter.
6) Remove the fuel injectors from the cylinder head or heads and rotate the engine over by hand removing any water from the cylinders. Then using the starter motor to remove any water that may be trapped in the cylinders. It is critical that the engine be rotated by hand before using the starter motor to allow sufficient time for the water to escape if a cylinder is full or nearly full. Then, squirt light lubricating oil into each cylinder to lubricate the cylinder walls and rings.
7) Series 2012/2013, 4.1, 6.1, 7.8, 1015, 2015, TCD12 & TCD16; Remove over flow valve (pressure regulating valve) from fuel galley. Drain and flush the fuel enclosed in fuel galley. On engines equipped with an internal fuel gallery.
8) Reinstall the fuel injectors. Replace high pressure fuel lines as necessary on all common rail engines.
9) Series 2.9/3.6/12/16L common rail pump. After the fuel system has been cleaned, and flushed. Remove the MPROP and overflow valve, then activate the lift pump to flush clean fuel thru the common rail pump.
10) Series 4.1/6.1/7.8L common rail pumps and fuel control unit. Disassemble and manually clean the fuel control unit. Replace any common rail fuel systems part that shows indications of water intrusion
IV. Lubrication System:
1) Drain and properly dispose of the lubricating oil mix in the oil pump. Replace lube oil.
2) Change the lube oil filter.
3) Drain the oil reservoir of the injection pump on 912/913/914/413/413F/413FR/513/513R and 1015 engines. (Note some older engines are equipped with a closed injection pump lubrication system. Oil will need to be added to the oil reservoir after draining.)
V. Cooling System:
1) Visually inspect the cooling system and clean as necessary.
2) On liquid cooled engines it might be necessary to replace the coolant. Visually check coolant and then test coolant using a hydrometer.
3) Inspect and clean the radiator and charge air cooler fins.
VI. Electrical System:
Any or all electrical components are suspect of contamination after submersion. This may not be immediately necessary but all of these components will most likely fail eventually due to being submerged.
1) The engine control unit (ECU) is not useable after submersion.
2) All engine sensors are suspect of potential failure.
3) Any pressure sensor related to the engine should be replaced. These sensors have small openings to the atmosphere that can become plugged with silt and contaminants. Ie; fuel pressure, oil pressure, exhaust back pressure, intake manifold pressure.
4) All electrical connectors should be opened and dried with compressed air.
5) Do not apply dielectric grease to connectors when reassembling. Dry fit connectors.
6) Inspect, clean and dry machine side of the ignition system including relays and fuses.
VII. SCR System:
1) Completely drain and flush the DEF tank with clean fresh water. Refill the tank with clean fresh DEF.
2) Remove the DEF suction and return line coming from the tank to the DEF pump module and blow out the lines using compressed air. Remove the DEF pressure line from the pump module to the injector and blow out with compressed air.
3) Change the DEF filter
4) Open and blow dry all DEF system electrical connectors. Replacement of DEF system relays is highly likely and encouraged.
After cleaning equipment and reassembling parts operate the engine for approximately 30 minutes, assuring the engine is at operating temperature. Then change the oil and filters, repeat oil change one time if oil remains milky. If the oil is still milky after second oil change and 30- to 60-minute run time. Have the engine evaluated by a DEUTZ distributer.
If engine disassembly is needed for thorough cleaning, this is best done by an experienced service technician.