Despite their immense size, rigid frame trucks are fairly simple machines to assess, according to Larry Bias, product support specialist for Power Equipment, Memphis, Tennessee. “Take extra time and carefully inspect the main frame,” he suggests. “If it’s free of cracks and twisted sections, you’re probably going to be all right.”
Steve Wilson, equipment manager for Marine Terminals, Armorel, Arkansas, advises you to find out as much as you can about the truck’s previous maintenance plan. “A rigid frame truck has a productive lifespan of 20,000 hours or more – provided preventive maintenance is carried out on schedule,” he says.
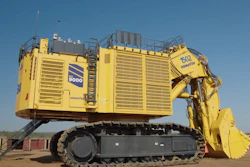
Our sample truck was a Komatsu HD465 with 11,000 hours on its meter. Wilson says most trucks in construction applications accumulate around 3,000 hours a year. But the trucks in his fleet run 24/7 hauling scrap steel, stopping only for scheduled maintenance. “They hold up very well,” he says. “We rarely have any unscheduled downtime.”
Start out by walking around your prospective truck and looking for obvious problems. Then move to the left front of the truck and check the truck’s engine. Stepping behind a HD465’s left front tire gives you full access to all the engine checkpoints. Bias says to check the oil level and make sure it’s free of water. “Also make sure there’s no diesel fuel in the oil,” he says. “You can usually smell it if there is. That’s a sign of a leaking fuel injector.”
Also look over any visible fan belts, hoses and electrical harnesses. If the engine is cool, open the radiator cap and verify both the level and condition of the coolant. Watch for signs of oil in the coolant, which Bias says is a sure sign of a leaking hydraulic cooler. Inspect the radiator itself to make sure it’s damage-free and in good condition.
Later on, when you’re topside on the truck, remember to open the upper engine hatch and look around. You’ll have full access to almost the entire engine from this vantage point. Look over the air ducts, water connections, fuel lines and fan blades and check the turbocharger for leaks.


Front suspension checks center on ride and steering cylinders
Don’t step out from behind the front tire once you finish your engine checks. You still need to assess the condition of the front suspension. Directly behind the wheel, inspect the front I-beam and steering cylinder. The left steering cylinder on our sample truck was leaking oil – probably the result of a scarred or pitted rod, Bias thought. “It’s not a serious leak right now, but it can get worse and needs to be repaired soon,” he said.
Mounted vertically behind the front wheel is a large ride cylinder that acts as a shock absorber for the front end. Make sure it’s in good shape and free of leaks. Also check that this cylinder isn’t resting directly on the frame. If the cylinder is charged properly, there will be about 6 inches of play between its base and the frame.
Now check the pins and bushings in the pivot arm. Make sure they’re tight. Also look over all weld lines on the pivot arm brackets. Watch for paint cracks, a sign that the truck has been overstressed. Remember to repeat these front suspension and steering checks on the right side of the truck.
Mid-body checks are quick, but crucial
Moving back down the left-hand side of the truck, check the hydraulic tank for damage or leaks. You’ll also be able to see most of the hydraulic lines coming off the tank as well as the hydraulic filters. The hydraulic pump is mounted behind the tank. You can do a preliminary inspection of the pump now, and then check it in greater detail later on when you raise the bed. All should be in good condition and leak free.
While you’re at the mid-body, go underneath the truck and check for any slack in the driveshaft universal joints. Now look over the bed cylinder. Again make sure the cylinder isn’t damaged in any way and it is not leaking. Later, when the bed is in the air, look to see that the rods are absolutely smooth and free of pitting and scarring. Take a look at the mounting pin that the cylinder is attached to. It should be properly lubricated and tight with no excessive play present. It’s a good idea to watch the bushings in the mounting pin while the bed is being raised and lowered to confirm that they are free of slack. Be sure to check the bed cylinder and mounting pin on the other side of the truck as well. Also make sure the rubber pads the bed rides on are all there and in good shape.
This is a good time to check the truck’s tires and the outside of its wheels. Usually, a quick visual inspection will suffice. Make sure there’s good tread life left on all tires, and be alert for excessive tire damage, mainly large chucks missing or tears in the tread or sidewalls. Also closely inspect all wheels for cracks and make sure all lug nuts are present.
Rear-end checks target leaks and metal fatigue
Start your rear truck inspection procedure by inspecting the shock absorber cylinders. As with the front ride cylinders, they should be fully charged with oil and dry nitrogen. Look again for a 4- to 6-inch gap between the cylinder its mounting bracket.
Look at the seals on the backside of both rear wheels and make sure they are leak free. Check underneath the differential and ensure it’s dry too. The Komatsu HD465 has drainage lines coming off its rear wheels so if a seal leaks it comes off the planetary and drains to the outside. Be sure and look for drainage lines to see if they’re dry.
Now check the stabilizer links that hold the bed to the differential. Make sure the pins and bushings are good and tight and that all grease lines are connected and in good shape. Double-check the mounting areas and determine if they’re free of cracks or welded areas. Likewise look over all visible rear frame sections and confirm that they’re straight and free of cracks and repair welds.
Inspect the pivot points where the bed mounts to the truck’s frame. They should be tight and free of excessive play. Watch for paint cracks and other damaged areas on these pivot points as well. The bed safety pin brackets should also be in good condition.
Topside
Now climb up on the truck and look around. The truck’s air filter assembly is up here. Make sure all connections are tight. Behind the air filter assembly, check the air tanks and air lines. They should be undamaged and dry.
Now look over the ROPS and make sure it’s in good condition. Inside, make sure the cab has been well cared for, and that all truck controls are in proper working order. Start the truck, and note any unusual engine or hydraulic noises.
Finally, raise the bed up and brace it with safety pins. You can now inspect the bottom of the bed for excess damage. Go over the frame in detail, paying close attention to any cracked or twisted sections – definite red flags, Bias says. Also inspect the driveline, all hydraulic cylinders, the differential, emergency brake, and transmission.