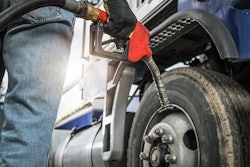
New or used, articulated trucks are in strong demand right now across the country, so we were glad to get a short layover with a Volvo A40D at Aring Equipment, a Volvo Construction Equipment dealer just outside of Milwaukee. As part of Aring’s rental fleet, our inspection unit had 3,741 hours on it, and was out the door within an hour after our inspection, back at work in a variety of general construction applications.
 Merle Coggins
Lending us his expertise in our inspection was Merle Coggins, Aring’s product trainer, and a 25-year veteran with the company who started out as a shop technician. He now trains those technicians, as well as supports his company’s field and sales forces. Using his practiced eye for details, Coggins took us around the A40D.
Starting off
“I always want a checklist to make sure I’m not missing anything,” says Coggins. (To view our handy list go to equipmentworld.com/digital.) Record the machine’s serial number and check the hours – make sure the hour meter is working and the condition of the machine matches the hours, noting that wear may be more severe in certain applications.
In addition to the checklist, come armed with an inspection arsenal: tire gauge, tire handbook for the specific brand, flashlight, oil sampling kit, measuring tape, shop rags and a digital camera. Use the latter to take note of any major oil leaks or damage, and to refresh your memory later on. And a second person comes in handy when inspecting diff locks and articulation joint movement during the operational phase of the check.
Then take a tour around the machine. Coggins looks at its general condition: Is it clean? Does it need to be repainted? Are there any leaks that are immediately apparent? Take note of any dents, cracks or welds on the cab, hitch, frame and body. “One area that may have cracks is on the frame where the drop box is mounted,” he says.
As you walk around, check all cylinders for worn hoses and seals, leaks and damage. Look for any serious dents or damage in the belly pan area. Check the brake master cylinder for leaks and the brake shoes or pads for wear. Look at the brake wear indicators on each wheel hub – if the wear indicator pin is flush with the stud head, then it’s time for a brake job.

Under the hood
The A40D has handy swing-down front service platform that gives easy access to under-hood components. Here, check for oil or fluid leaks. Then note the engine and transmission fluid levels. Pull the dipstick and look at the cleanliness of the engine oil. Red flags include oil that’s black, indicating it hasn’t been changed, a possible sign of lax maintenance practices. Oil that’s milky shows the presence of water or antifreeze, the result of bad O-rings or a leaking oil cooler. If the oil reservoir is overfull, you may have a leaking fuel injector.
Note the hours and dates written on all filters. Make sure they correlate to the machine’s hour meter reading.
Check the level in the coolant reservoir and look for leaks and damaged hoses. Open the radiator cap and check for bubbles, which indicate exhaust pressure in the system, and the possibility of a cracked cylinder head. Make sure the radiator is not packed with dirt or damaged from an accident. On the charge air cooler side, make sure all brackets are tight, and there are no damaged fins.
With the engine running, remove the engine filler cap and check for blow-by, or excessive crankcase pressure, which indicates worn rings. “See how much oil and vapors are being expelled,” Coggins advises. “There will always be a little bit, but if there’s a lot, it needs to be looked at.” If a low-hour engine shows blow-by problems, remove the oil filter and inspect it for wear particles and contamination.
Body/rear area
Further back, if the truck body cushions are tight against the frame instead of showing a good amount of rubber, they will need to be replaced. “The rubber blocks get squashed down in use and the rubber layers may start to separate,” Coggins says. Also look for cracks where the frame carries the load and in the suspension area.
 Inspect the entire frame for cracks, welds or signs of excessive damage. Carefully look at hoses, seals and rods of all cylinders. Do any need to be replaced?
Get in the cab, start the engine and raise the body, then put the body safety device in place to hold it in the raised position before getting underneath. The truck is now in an ideal position for you to get a close up of everything underneath the rear body.
Check the body floor and sides for wear and note if it has a liner. Does it need to be relined? Examine the hoist cylinders for damage. Look for leakage on the cylinder seals, and inspect the cylinder rod plating for chips, cracks and scratches. Observe the bushings at the top and bottom of the cylinders to see if there’s any looseness or play in them.
 Inspect the axle rubber springs for cracking and separation.
Examine the underside of the body, the rear suspension system, axles, final drives and rear tires. The rubber spring blocks should be inspected for cracking and separation. If the rubber comes apart, it will allow the axle to move freely, something you want to prevent.
Check for cracks and welds on the mainframe. On the rear suspension, look at the rubber elements, frame, cross stays, bogie beams and tie rods, looking for leaks, excessive damage and broken components.
Examine final drives for leaks. If something concerns you, drain oil and check for cuttings and pull the cover and inspect gears.
Disengage the safety device and lower the truck body. Are the back pivot pins well greased? “If they are dry looking, I’d be concerned they hadn’t been lubed properly,” Coggins says.
Cab/operational checks
Start the engine and check all lights and gauges. Make sure the air conditioning, heater, lights, horn and backup alarms work. “If the gauges didn’t work, or there was a warning light or a broken switch, I’d be concerned it hadn’t been well maintained,” Coggins states.
 The tires on our A40D had some nicks and cuts, but none of them were severe enough to merit concern.
Look around the cab: What condition is the seat in? Is it fully adjustable? Is there any broken or cracked glass? Is it clean?
Now it’s time to put the machine through its paces. At this point, it’s handy to have someone else operating the machine so you can observe what’s happening as you go through the operational checks.
Test each speed and shift in each gear, checking for unusual noises in the power train and how smooth it shifts. Check the differential to see if it functions properly in drive modes (the A40D has five):
• 4-wheel drive, differential locks disengaged.
• 4-wheel drive and transverse differential lock on front axle.
• 6-wheel drive and longitudinal differential lock.
• 6-wheel drive, longitudinal differential lock and differential lock on front axle.
• 6-wheel drive, all differential locks engaged.
Note any unusual noises or abnormal operation and check the transmission clutch pressures and compare them to the machine’s specifications.
 While you’re underneath the machine, look for any hanging wires, broken springs, loose bolts or bad bearings. Caked, oil mud signals a leak.
Next, raise and lower the bed and time the cycle. Compare the cycle time with specs for a new machine – on the A40D, for example, new specs are 12 seconds up and 10 seconds down. As the bed lowers, check the float and hold operations. Steer the front wheels back and forth in a rocking motion to check for any sloppiness in steering system pins and bushings and in the articulation joint. “If there was a lot of slop in the articulation joint’s pins and bushings, it could be labor intensive to replace,” Coggins says.
Test the service brakes by holding the brake pedal down and trying to drive through the brakes in third and fourth gear. The brakes should be able to hold the truck. Stop the unit three or four times while going in forward and reverse to check the brake system pressure, noting how fast it drops and if it recovers. “This tells me how well the brakes hold under load,” Coggins adds. “And if I had a steep hill to park it on, I would check the parking brakes as well.” At higher speeds, check the retarder to see if it’s functioning properly.
Listen to the engine: Is it running smoothly? Are there any misfires or belts squealing? “Sometimes you can hear an exhaust leak,” Coggins says. “I’ll also listen for any whining in the hydraulic pump system.” Look for unusual smoke from the exhaust system. If there are odd noises or abnormal operation, and you want to investigate further, check the clutch pressure, drain the oil and inspect for cuttings or wear particles.
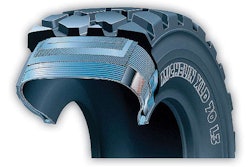
Tires
When you’re checking tires, make sure they are all the same size – mismatched tires wear on drive trains. Check each tire’s tread with a tire gauge and compare it with new tire specs to determine the remaining tread. Look at tire pressures and verify there are no issues with the rim of the wheel. Also look for missing wheel lug nuts and bolts. And as simple as it sounds, be sure to check each tire – just because one or two are in good shape doesn’t mean they all are.
“If there are signs of uneven tire wear, I’d start to look at the suspension more carefully, and see if there are any signs of axle misalignment,” Coggins says, who also notes he wouldn’t shy away from recaps if they’re in good condition.
Articulation joint
In the hitch area, look at the oil level and check for cracks and welds. The rubber bushing at the bottom of the articulation joint that connects with the A-arm will get smaller as it deteriorates. “In severe cases, it will actually contact the frame,” Coggins notes, “so I look for signs of rubber peeling out, which tells me it’s starting to come apart.” Coggins also notes any broken bolts around the joints.
Raise the body and lower it, checking it for movement in the articulation joint. Move the steering cylinders and check for pin and bushing wear in this area. Inspect for rust.
Front suspension system
The A40D has a three-point A-frame suspension system in the front and the back. “Get underneath the machine so you can see everything,” Coggins says. Check the front suspension’s frame, cross stay, shock absorbers, rubber springs and spherical bushings.
 When examining the articulation joint, look closely at the condition of the bottom rubber bushing. A worn bushing will have to be replaced.
While he’s underneath the machine, Coggins notes any hanging electrical wires, broken springs, loose bolts, bad bearings and any caked oily mud – the sure sign of a leak developing. It’s in this area that you can observe any damage that may have occurred from running over obstacles.
Final notes
Ask about the history of machine – including past owners, past applications and what the machine was hauling – and whether service records are available. And check out the computer records on newer models. On the A40D, for example, you can check MATRIS machine tracking information records, which will give you the entire life of the machine – including fuel consumption rates and any error codes – on a computer readout. Cost out any required repairs. And if you’re seriously considering buying machine, be sure to take an oil sample.
To print a handy checklist to use during your inspection, visit our digital issue at www.EquipmentWorld.com/digital.
USED ARTICULATED HAULER LIST
Make/model:
Year:
Serial number:
Hours:
Previous owner/application:
Does it need to cleaned and/or painted?
Engine
Make/model Serial number How does it start? Hours since overhaul Oil leaks? Oil pressure? Condition of engine oil Overfull on dipstick? Engine power Any unusual noises or misses? Radiator condition Charge air cooler condition Antifreeze condition Blow-by check Fuel system Oil analysis results
Transmission
Leaks? Condition of transmission oil Fluid level Filter condition Condition of hoses and lines Any slippage during operation? Operates easily in all speeds, forward and reverse? High/low dropbox Differential locks, test in all ranges:
• 4-wheel drive, diff locks disengaged
• 4-wheel drive w. transverse diff lock on front axle
• 6-wheel drive and longitudinal diff lock
• 6-wheel drive, longitudinal diff lock and diff lock on front axle.
• 6-wheel drive, all diff locks engaged
Drive line/U joints Torque converter
Brakes
Operational checks:
• Do the breaks hold the truck when you test them by pressing the brake pedal down and trying to drive through the brakes in 3rd and 4th gear?
• Move forward and stop the unit three or four times to check how fast the brake system pressure drops and if it recovers.
• Check emergency brake by applying the brake and trying to drive through 4th gear
Leaks in the master cylinder? Wear on brake shoes or pads Parking brake
Retarder function properly?
Hydraulics
Leaks?
Worn hoses?
Pumps
Tank
Unusual noises from the hydraulic pump or air in the system?
Condition of cylinders
• Hoist
• Steering
Body lift and return cycle time
Final drives/planetaries
Leaks?
Unusual noises?
Articulation hitch
Any cracks or welds?
Pin and bushing wear
Lubricated?
Any rust?
Pivot point nut tight?
Operational checks:
• Drop the body from the raised position and check for movement
• Move the steering cylinders and check for pin and bushing wear
Suspension system
Front suspension, condition of:
• Shock absorbers
• Rubber springs
• Spherical bushings
Rear suspension, condition of:
• Rubber elements
• Bogie beams
• Tie rods
Cab
General condition
Gauges and controls:
• Heater
• AC
• Wipers
• Lights
• Electronic monitoring system
• Back-up alarm
• Horn
Mirrors
Glass
Doors/handles
Seat upholstery
Seat fully adjustable?
Frame/body
Cracks or welds?
Steps and grab bars
Hood/front panels
Any damage or dents in the body?
Body wear
Belly pan condition
Condition of guards
Fuel tank condition
Liner condition (if applicable)
Tailgate condition (if applicable)
Tires
Condition of wheels, hubs and rims
Any retreads?

History/Comments
Comments of previous owner or seller
Detail any recent repairs and rebuilds and who did them
Condition of maintenance records – available electronically?
Note any repairs and estimated costs